NSX-T bare-metal TN
NSX-T bare-metal TN
NSX Considerations
In term of design the Bare-metal server (windows or linux) will be a transport node and partecipates with at least one interface into the overlay transport zone as a VTEP, this interface will be dedicated to this type of traffic and requires a physical channel with at least 1600 MTU. In this example the VTEP IPs assignment will be managed by an IP pool defined with the range:
- 172.20.11.151 - 172.20.11.170
Reqirement
Installing nsx-t Vibs on bare metal server is possible for main Linux distributions and for Microsoft Windows Server 2016/2019. For using a bare metal server as a Transport Node is required to install some packages before preparing it from NSX UI. permit ssh root login
Linux
- For Linux server install packages with the default package manager in base of your distro. This is an example with an Ubuntu 18.04 OS:
sudo apt-get update

sudo apt-get install -y traceroute python-mako python-netaddr   python-simplejson   python-unittest2   python-yaml  python-openssl   dkms  libvirt0 libelf-dev python-netifaces
- we have 2 interfaces, the first one is the management interface that will communicate with the NSX-T manager, the second one is the designed VTEP interface that will incapsulate the traffic and is connected to the transport VLAN.

- Once the package are installed go to the NSX GUI and add the transport node
- Go to System → Fabric → Nodes → Host Transport Node
- On the Host Transport Node page, click + Add Host Node.
- On the Host Details window, enter the following details:

note If you leave the thumbprint value empty, you are prompted to accept the server provided value. It takes a few seconds for NSX-T Data Center to discover and authenticate the host.
- On the Prepare Host window, enter the following details. You can only configure a single N-VDS switch for a single physical server

In this configuration you need to specify the Transport Zones that will be attached to the host and the Uplink profile (if you are using a custom Uplink profile with a VLAN ID you need to select it for traffic flow.). at the bottom select the interface designed for VTEP, in this example will be the ens192 interface.
- Now wath to configuration will be loaded to the target server:
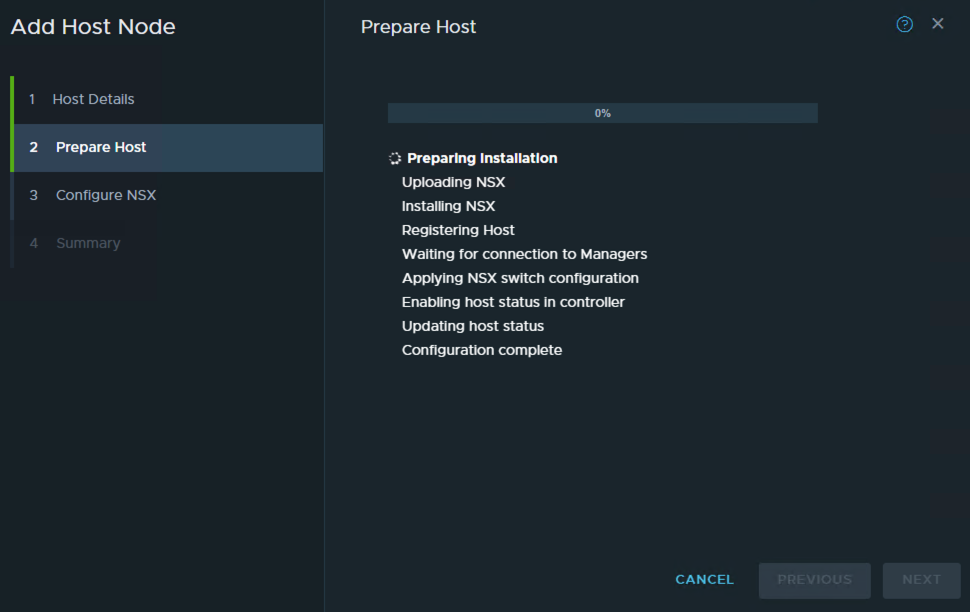
few minutes and the installation completes:

In this moment, the Transport Node installation is completed, and we can assign an application port over the segment or continue later, please click continue later.
- Verify that the Ubuntu-bm transport node is ready and the VTEP is assigned:
 the VTEP adress assigned is 172.20.11.155/24
Go to the shell and inspect interfaces:
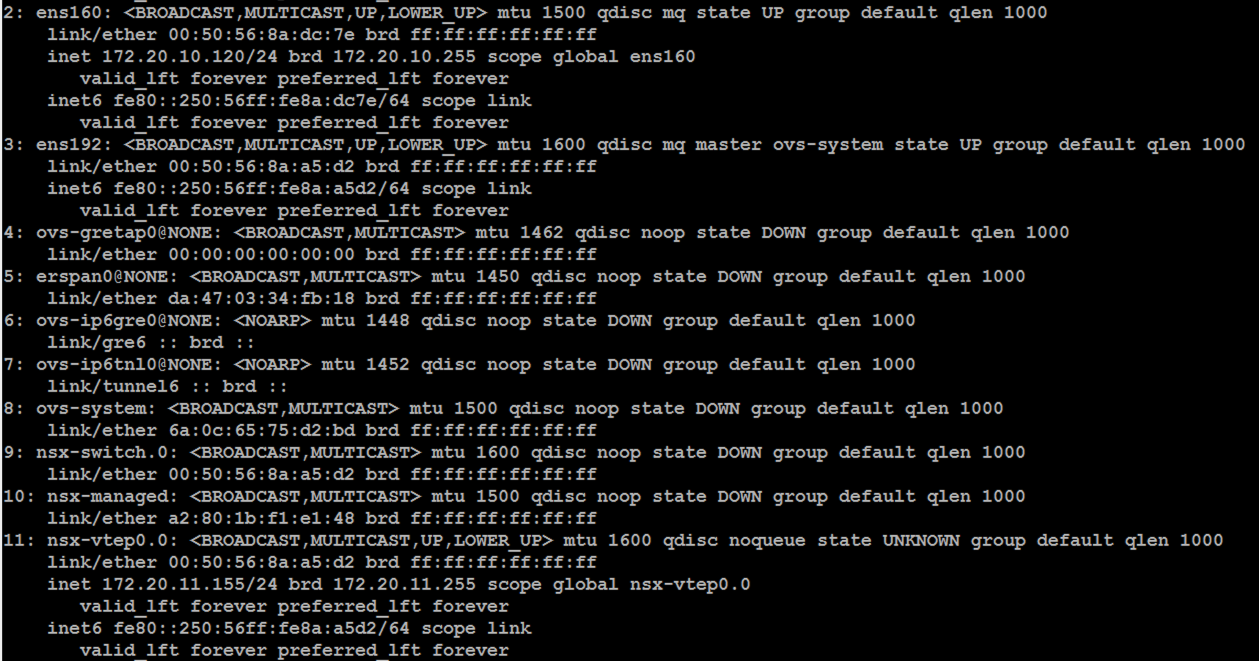
We can see that the ens192 MTU is setted to 1600 and OVS modules are implemented, finally we can see the VTEP kernel-interface
Windows Server 2016
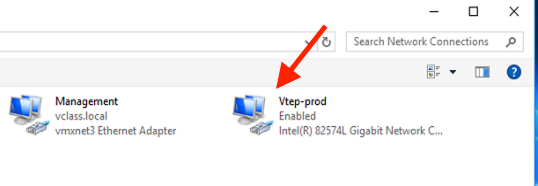
In this phase we are going to configure a Windows Server 2016 as a Transport Node using the second interface as VTEP, thi is interface is connected to the same transport VLAN that is used for Ubuntu and esxi hosts VTEP.
- For Windows server we need to enable Windows Remote Management (WinRM) to allow the Windows server to interoperate with third-party software and hardware
Run on Powershell:
[Net.ServicePointManager]::SecurityProtocol = [Net.SecurityProtocolType]::Tls12
wget -o ConfigureWinRMService.ps1 https://raw.github.com/vmware/bare-metal-server-integration-with-nsxt/blob/master/bms-ansible-nsx/windows/ConfigureWinRMService.ps1
powershell.exe -ExecutionPolicy ByPass -File ConfigureWinRMService.ps1

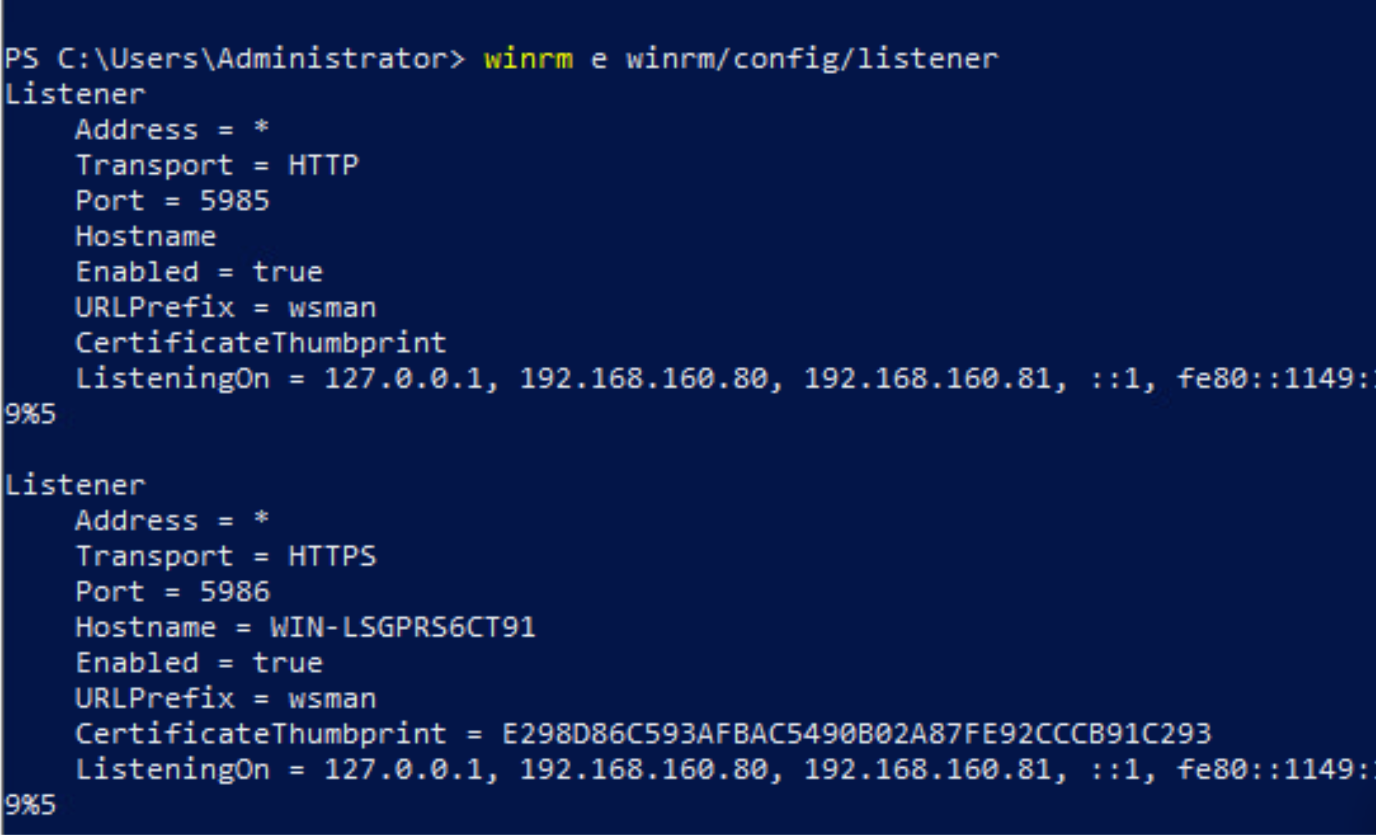
Run the following command to verify the configuration of WinRM listeners:
- The second Step is installing the NSX kernel module for unlock the VirtualIF functionality on your Windows Server, is important to install kernel module at the same version of your NSX-T Manager. The Kernel- Module is available at download.vmware.com, in nsx-t section.
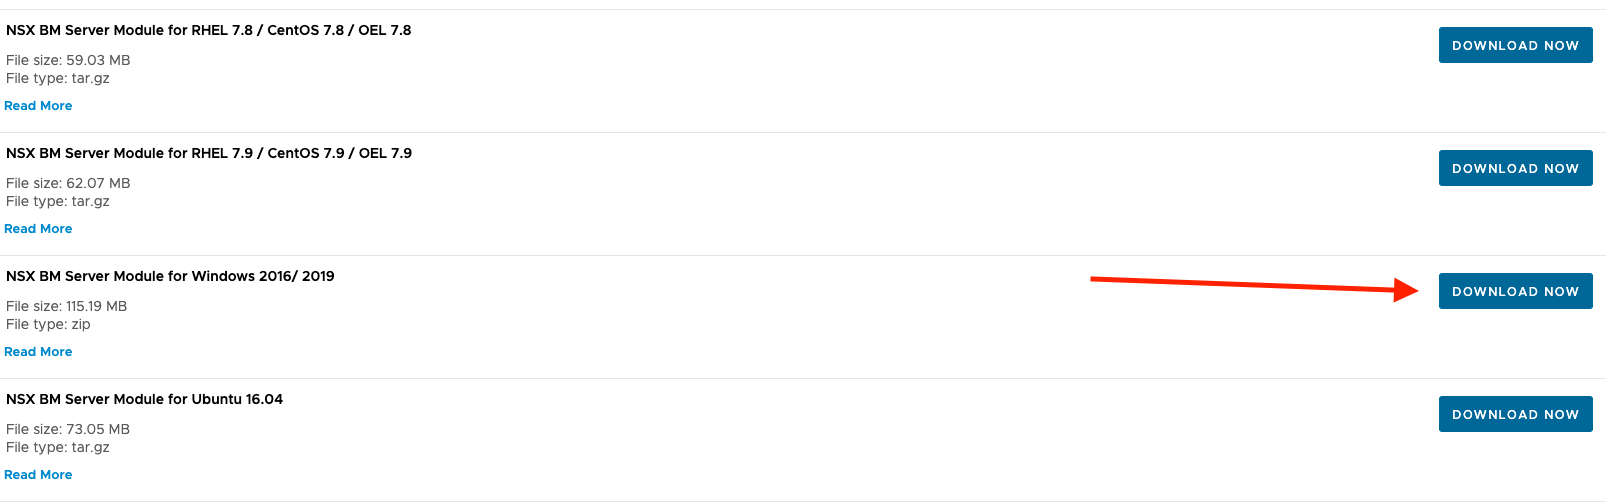
Extract the zip file and open the installer “.exe”
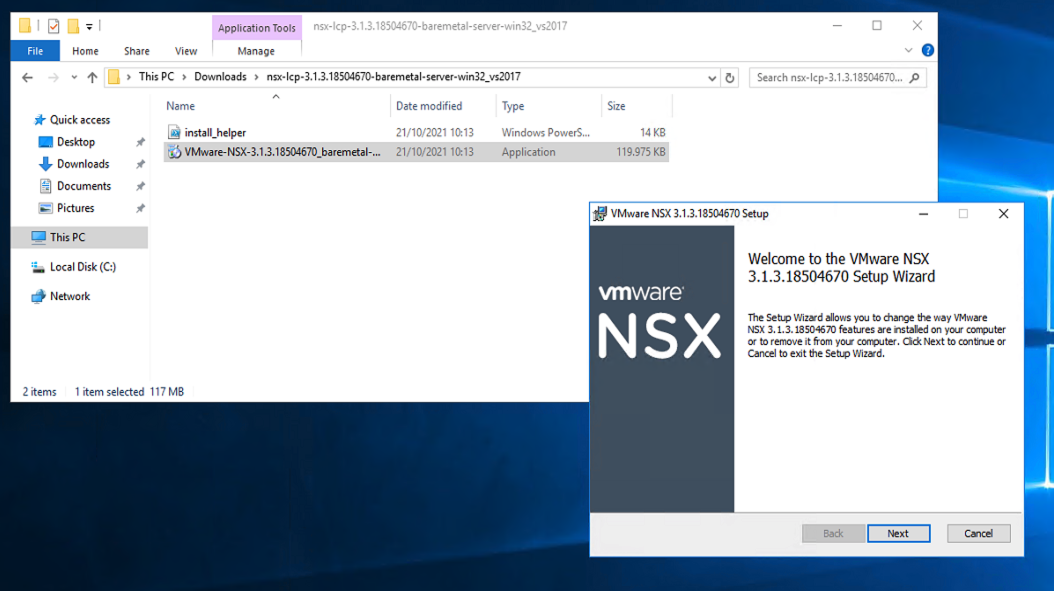
Follow the instruction and install the modules.
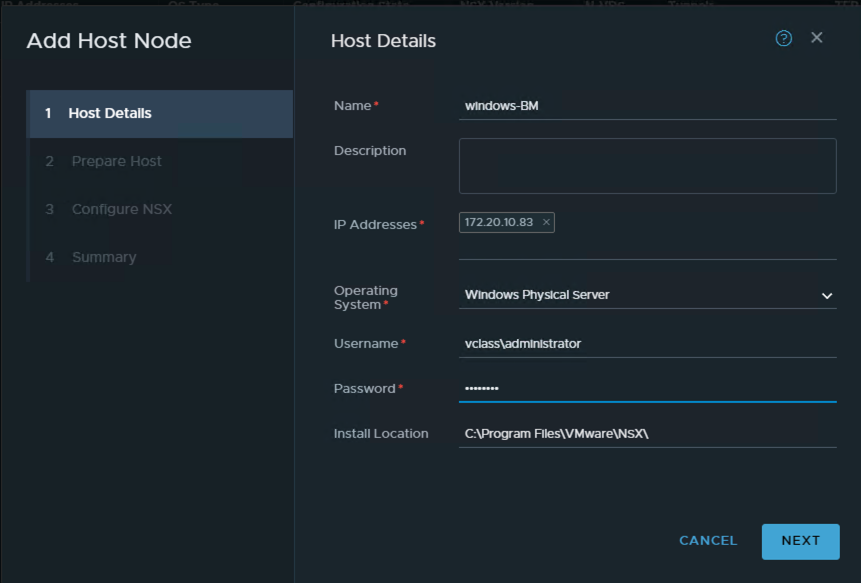
- Prepare the windows Bare-metal server trought the NSX UI
- Go to System → Fabric → Nodes → Host Transport Node
- On the Host Transport Node page, click + Add Host Node.
- On the Host Details window, enter the following details:
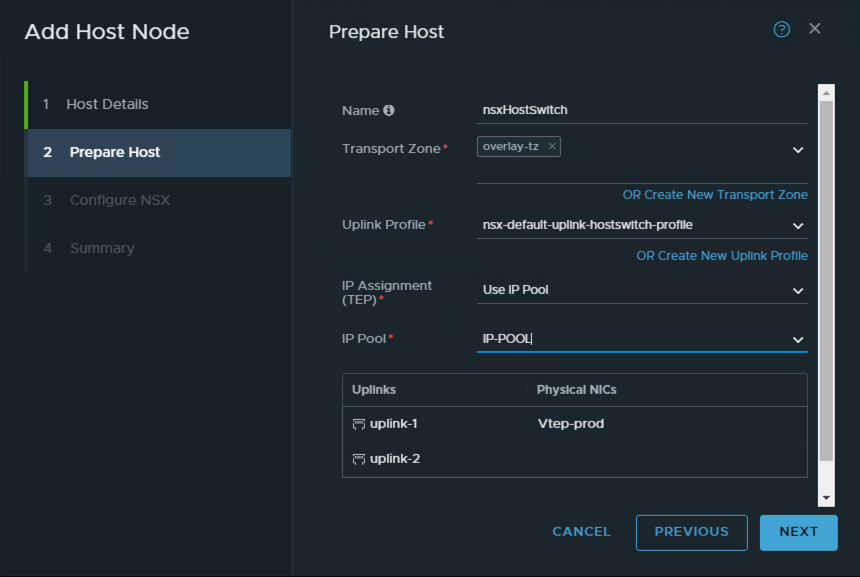
In this configuration you need to specify the Transport Zones that will be attached to the host and the Uplink profile (if you are using a custom Uplink profile with a VLAN ID you need to select it for traffic flow prperly.). at the bottom select the interface designed for VTEP, in this example will be the Vtep-prod interface name.
At the same way of ubuntu preparation, after few minutes the windows server is prepared and ready, you can now attach a segment Application port or do it later.